Why Checking Tire Pressure Matters for Your Car
Proper tire inflation is essential for safe driving and efficient fuel consumption. Knowing how to check tire pressure ensures your tires are in optimal condition. Underinflated or overinflated tires can lead to uneven wear, reduced grip, and increased risk of blowouts. Additionally, maintaining the correct pressure improves gas mileage by up to 3%. This simple task not only enhances vehicle performance but also extends tire lifespan. Regular checks save money and improve overall safety.
Many drivers overlook this critical step because they assume visual inspections suffice. However, a tire may lose air gradually without showing visible signs. That’s why using a reliable tool like a tire pressure gauge becomes crucial. With regular practice, checking tire pressure becomes second nature. It’s an easy habit that pays off significantly in the long run.
Importance of Regular Tire Pressure Checks
Maintaining the correct tire pressure is crucial for the safety and efficiency of your vehicle. Below are key reasons why regular checks are a must:
- Enhanced Safety: Proper tire pressure ensures optimal contact with the road. This improves traction and reduces the risk of accidents.
- Improved Fuel Economy: Over or under-inflated tires can lead to higher fuel consumption. Checking tire pressure helps keep fuel costs down.
- Extended Tire Life: Tires with the correct pressure wear more evenly. This prolongs their life and saves you money on replacements.
- Better Handling: The vehicle’s handling is more responsive when tire pressure is at its recommended level. This gives you better control when driving.
- Reduced Carbon Footprint: Correct tire pressure means your car burns fuel more efficiently, producing less CO2 emissions.
Remembering to check tire pressure regularly can prevent these potentially costly and dangerous issues. Make it a habit to check your pressure every month and before long trips or carrying extra load.
Tools Required for Checking Tire Pressure
Before you start the process of checking your tire pressure, gather the right tools. You’ll need a few basic items:
- Quality Tire Pressure Gauge:
- It is crucial to have a reliable tire pressure gauge to ensure you get an accurate reading.
- There are various types to choose from:
- Digital Gauges: These provide an easy-to-read display and often give quick, precise measurements.
- Dial Gauges: These have a needle that points to the pressure level on a circular dial, offering a traditional method for checking tire pressure.
- Stick Gauges: These are simple and portable, showing pressure on a graduated stick that pops out when pressed against the valve stem.
- Air Compressor:
- An air compressor is necessary if you find that your tires need inflation.
- You can usually find an air compressor at a gas station, which can be used to inflate your tires to the recommended pressure.
- Vehicle Owner’s Manual:
- Your vehicle’s owner’s manual is an essential resource for information regarding the appropriate tire pressure.
- It provides the manufacturer’s recommended PSI (pounds per square inch) for your specific tires, ensuring optimal performance and safety.
- Pen and Paper (optional):
- Keeping a pen and paper handy can be beneficial for jotting down the pressure readings of each tire.
- This can help you track any fluctuations in tire pressure over time and ensure that each tire is properly inflated according to the manufacturer’s specifications.
Having these tools at hand before you begin ensures a smooth and efficient process for checking your tire pressure. Choosing a reliable tire pressure gauge will help maintain your vehicle‘s tire health and ensure your safety on the road.
Step 1: Finding the Recommended Tire Pressure
Knowing the correct tire pressure for your vehicle is critical. Find it in these ways:
- Check the Owner’s Manual: Your vehicle’s manual always lists the recommended tire pressure.
- Look Inside the Driver’s Door: Manufacturers often place a sticker here with the correct pressures.
- Consult the Tire Information Placard: This is usually found inside the driver’s door jamb or glove box.
- Search Online: If you’re without the manual, a quick online search with your vehicle’s make and model can help.
It’s important to remember that the front and rear tires may require different pressures. Always check for both and note them down. Also, consider that pressure recommendations might change with added weight or towing. Keeping this information handy will help you maintain your tires properly.
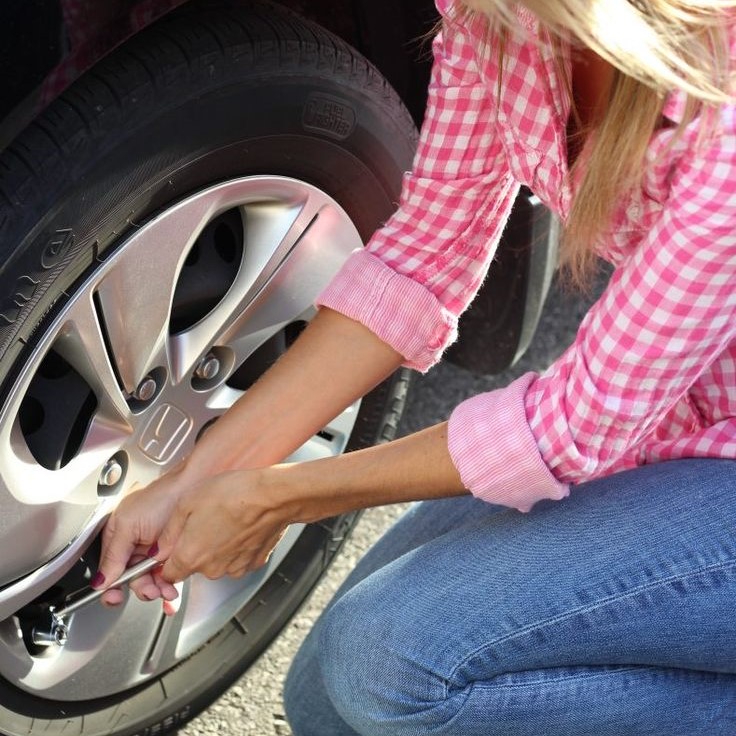
Step 2: Removing the Valve Cap and Checking Pressure
Once you’ve found your vehicle’s recommended tire pressure, it’s time to check the actual pressure. Start by locating the valve stem on each tire. The valve stem is a small protrusion with a cap that you unscrew to access the tire’s air. Here’s how to proceed:
- Find the valve stem: It’s usually on the side of the tire that faces outward.
- Remove the cap: Twist it counterclockwise until it comes off. Keep the cap safe; you’ll need to put it back on after.
- Press the gauge onto the valve stem: Take your tire pressure gauge and press it firmly onto the valve stem. If you hear a hissing sound, reposition the gauge until the hissing stops.
- Read the pressure: Once the gauge is in place, it’ll display the tire’s pressure. Note the reading for each tire.
- Compare to recommended pressure: Take the readings you got and compare them to the recommended pressures you found earlier.
- Repeat for all tires: Don’t forget to check all four tires, including the spare if you have one.
Checking your tire pressure is a quick process, but it’s crucial for your safety on the road. The right pressure ensures your vehicle performs at its best. Use the tire pressure gauge correctly to get an accurate measurement and make adjustments if needed. After you’ve checked all the tires, move on to the next step, which involves adjusting the pressure to the appropriate level.
Step 3: Inflating or Deflating to the Correct Pressure
After checking your tire pressure and comparing it with the recommended levels, you may need to adjust it. Tires can be either overinflated or underinflated. Here’s what to do in each case:
- If the Pressure is Low: Attach the air hose from the air compressor to the valve stem. Fill the tire in short bursts, checking the pressure after each one. Continue until you reach the suggested level.
- If the Pressure is High: Press the pin inside the valve stem to let out some air. Check the pressure frequently to avoid deflating too much. Stop when you hit the target pressure.
While inflating or deflating:
- Go Slow: It’s best to make small adjustments to avoid overshooting the correct pressure.
- Use Your Gauge: Check the pressure after each adjustment. Trust your tire pressure gauge for accurate readings.
- Monitor Temperature: Tire pressure can change with temperature. Cooler days might mean your tires need more air.
- Fill Up Responsibly: When using a public air compressor, make sure you don’t block others or take too long.
Taking the time to inflate or deflate your tires to their correct pressure is key for vehicle performance and tire longevity. Once you’ve adjusted all your tires to the right pressure, you’re ready for the next step.
Step 4: Rechecking the Pressure
After adjusting the tire pressure, it’s essential to double-check your work. Rechecking ensures that you’ve reached the correct tire pressure and that no errors occurred during the inflation or deflation process. Here are the simple steps to follow for rechecking the pressure:
- Reconnect the Gauge: Place your tire pressure gauge back on the valve stem. This will confirm the current pressure.
- Confirm the Pressure: Look at the gauge reading to ensure it matches the recommended pressure for your tires.
- Adjust if Necessary: If the reading is not right, adjust the air again. Inflate or deflate as needed and check once more.
- Check All Tires Again: Don’t just recheck one tire. Go around to each tire and repeat the process to ensure uniform pressure.
- Be Thorough: It’s better to take a few extra minutes for this step than to deal with tire-related problems later.
Rechecking the tire pressure might seem like a redundant step, but it’s key to maintaining tire integrity and vehicle safety. Make sure to do this each time you learn how to check tire pressure and adjust your vehicle’s tires.
Step 5: Replacing the Valve Cap Securely
The final step in how to check tire pressure is replacing the valve cap securely. This small cap plays a crucial role in protecting the valve stem from dirt and debris, which can lead to air leaks. Here is the right way to finish the tire pressure checking process:
Inspect the Valve Cap:
Before reattaching the valve cap, it is important to examine it thoroughly.
Ensure that the cap is clean and free from dirt or debris that could interfere with the seal.
Check for any visible damage, such as cracks or warping.
A damaged valve cap can compromise the seal, which may lead to slow air leaks from the tire.
Tighten the Cap:
Carefully screw the valve cap back onto the valve stem.
Be sure to twist the cap clockwise to ensure it is properly aligned.
Pay close attention to avoid cross-threading, which occurs when the cap is not aligned correctly with the threads on the valve stem.
Cross-threading can damage the threads and create sealing issues.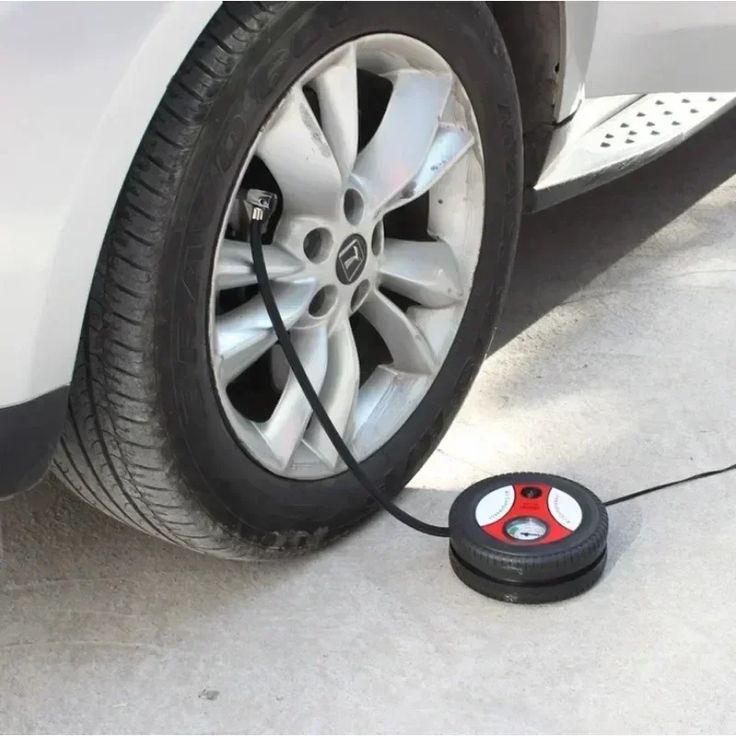
Don’t Over-tighten:
While it is crucial for the cap to be secure, be cautious not to over-tighten it.
Over-tightening can lead to the cap breaking or becoming stuck, making it difficult to remove in the future.
Tighten the cap until you feel it stop, then give it a gentle nudge to ensure it is snug but not overly tight.
Double-Check All Caps:
Once the cap on the first tire is replaced, proceed to the next tire following the same process.
Check that all valve caps are secure on each tire, not just the first one.
Remember to include the spare tire in your checks if it was also inspected; a secure cap is important for maintaining proper tire pressure.
Replacing the valve cap properly ensures that your tire retains the correct pressure after you’ve checked it. It’s a simple but necessary step in the tire pressure maintenance routine. Do this every time you check your tire pressure to protect the valve stem and maintain tire integrity.

Tips for Maintaining Optimal Tire Pressure
Maintaining optimal tire pressure is not just about checking it routinely but also about adopting good practices. Here are tips to help you keep the pressure at ideal levels:
- Check Regularly: Make it a habit to check your tire pressure at least once a month and before long trips.
- Use the Right Gauge: Invest in a high-quality tire pressure gauge. It provides more accurate readings than those at gas stations.
- Monitor Temperature Changes: Tire pressure can drop in cold weather. Add air during winter and check when seasons change.
- Don’t Forget the Spare: Your spare tire needs attention too. Check and maintain its pressure just as you would with the others.
- Avoid Overloading: Your vehicle has a load capacity. Exceeding it can cause tire pressure to change. Stick to the recommended limits.
- Check When Tires Are Cold: Tire pressure readings are most accurate when the tires haven’t been warmed up by driving.
- Replace Caps Quickly: Always replace valve caps immediately after checking. They protect against leaks and dirt.
Following these tips can significantly increase the life of your tires and improve your vehicle’s performance. Always remember, keeping an eye on your tire pressure is key to safe and efficient driving.
Final Thoughts on Mastering Tire Pressure Checks
In conclusion, mastering how to check tire pressure represents a fundamental skill every responsible driver should possess. By following the outlined steps diligently, you protect yourself, passengers, and others sharing the road. Simultaneously, you contribute positively toward conserving energy resources and protecting our planet. Incorporate this habit into weekly routines alongside other essential car maintenance activities.
Remember, even minor deviations from standard pressures accumulate negatively over extended periods. Stay proactive rather than reactive regarding tire care. Share learned knowledge with friends and family to promote collective awareness. Together, we create safer roads and healthier environments for everyone involved.